Step 1
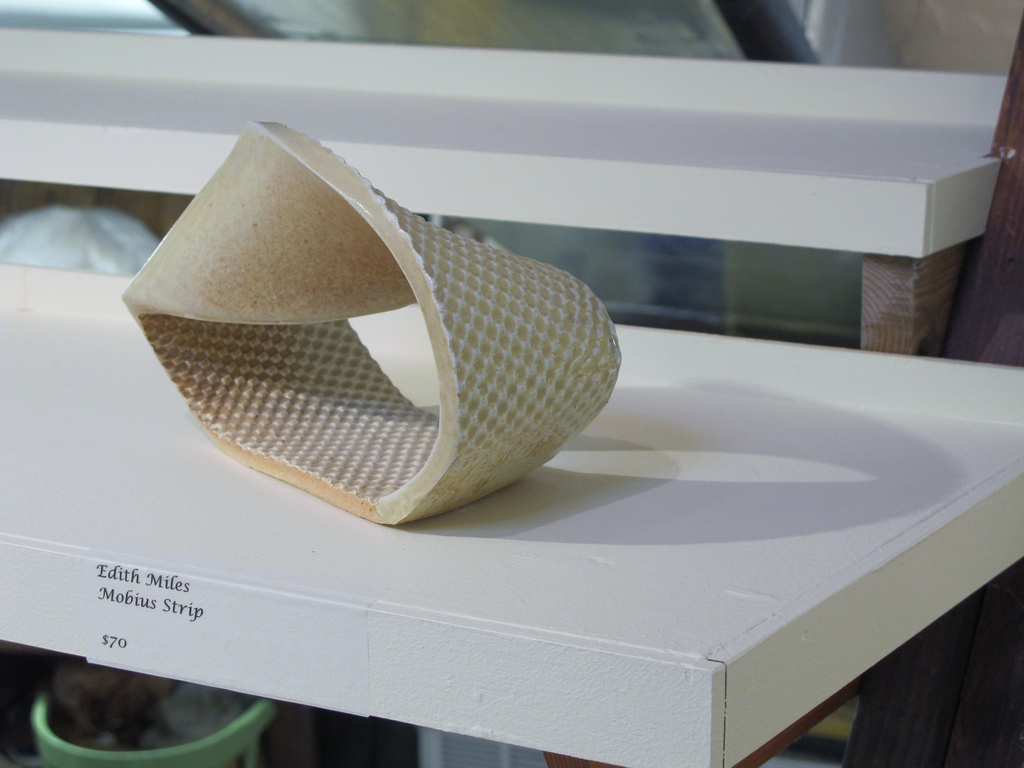
Prepare the Mobius strips prior to the demonstration. Create 3 Mobius strips and a single normal loop. To make a Mobius strip, cut out a strip of paper with a width-to-length ratio of 1:4 – for example, a strip 3cm wide and 12cm long. Add a half-twist to the strip in either the clockwise or anti-clockwise sense by flipping one of the ends and then taping the ends together. To create a normal loop just directly connect the two ends of a strip of paper using tape.
Step 2
Show the participant the Mobius strip and explain how it was made by making another one in front of them. Contrast the Mobius strip with the a normal loop of paper that was made beforehand. Encourage the participant to create their own Mobius strip.
Step 3
Ask the participant how many faces and edges the normal loop has. If needs be, point out one of the faces and edges of the loop and let the participant identify the others. Afterwards, summarise this step of the experiment by explaining that the normal loop of paper has two separate edges – emphasize how the two edges are distinct because they do not touch- and two faces because the outside face and the inside face are separated by an edge. Ask the participant how many faces and edges they think the Mobius strip has. Explain that they will now test these ideas (hypothese).
Step 4
The participant will first test their hypothesis about the number of faces. Give them a marker and instruct them to draw a line all the way around the strip. The line should travel through the centre of the width of the strip.
Step 5
The participant then tests their hypothesis about the number of edges. Ask the participant to draw on the edge of the strip, all the way round until they reach the end.
Step 6
Ask the participant again how many faces and edges they think the Mobius strip has. As a hint, you may point out the fact that they were able to trace the entire face with one single stroke, and the entire edge with one single stroke. Explain that as long as they can continue to draw a continuous line along a surface or edge, they are travelling along the same surface or edge.
Step 7
Ask the participant whether their initial hypothese about the number of faces and edges in the Mobius strip were were supported or not by their experimental results.
Step 8
Give the participant a pair of safety scissors and ask them to cut the normal loop of paper lengthwise and observe what happens when it is cut. Two loops should be formed as the result. Now ask the participant what they think will happen when the Mobius strip is cut lengthwise.
Step 9
Instruct the participant to use the safety scissors to cut the Mobius strip lengthwise in the middle and to observe the result and compare it to their hypothesis. Step 9 If the participant remains interested, ask them what they think will happen when the Mobius strip is not cut directly in the middle, but rather closer to the edge. Step 10 Encourage the participant to carry out the test for themselves and observe the result.
- Instead of asking the participant cut close to the edge of the Mobius strip, ask them to make a Mobius strip with two twists and then ask them to cut it in half and observe what happens.
- Use of scissors requires caution, especially when young children are carrying out the activity. When not in use, scissors should be left lying down on a table. They should not be held close to the face. Scissors should be carried with the point facing downwards.
The demonstration can be carried out in such a way that a sense of inquisition and discovery is inspired in the participant. Although the demonstrator should guide the participant according to the method, the participant should be encouraged to explore the Mobius strip and make observations throughout the experiment.
Explain to the participant that, just like a scientist in a lab, they are coming up with ideas about what will happen (hypothese) and are then testing them out experimentally to see whether these hypothese are supported by experimental results.
What’s the difference between cutting the Mobius strip at the edge or in the middle of its face?
When you cut it on the edge, you are cutting it twice round, giving two interlinked Mobius strips, while if you cut it in the middle, you are cutting it once around, producing one Mobius strip with more twists.
Why does the Mobius strip have one face and one edge?
By adding a half twist to the strip, we connect the separate edges of the normal loop as well as the separate faces of the normal loop.
What happens if you cut it closer to the edge?
Since the result was a skinny Mobius strip when you cut it very close to the edge, if you cut it closer, it should end up skinnier than before.
What happens if you add in more twists?
It is still a Mobius strip, just with more twists. Although, if you have an even number of twists, the object has two faces and two edges.
While if it has an odd number of twists, the object has one edge and one face. What happens if you cut a Mobius strip with more twists?
If it has an even number of twists such as two or four, when you cut it, it will separate into two Mobius strips with the same number of twists. If it had an odd number of twists and you cut it, it will attain more twists.
The Mobius strip is a remarkable 3 dimensional (3D) object with the unique property of having one side and one edge. The fact that it only has one face (surface) means that were you to travel along one side of the strip, you would end up walking all the way to the other side of the paper, and coming back round to where you initially started with the same orientation as the one you started with!
The most interesting property of a Mobius strip becomes evident when one tries to cut it in half lengthwise. If you were to do this, you would end up making a smaller Mobius strip but with more twists. Whereas the original had one twist, the new Mobius strip would have four twists.
Mathematically, a Mobius strip is a surface which is non-orientable in 3D space. Non-orientable surfaces also exist in higher dimensional spaces. One such surface is the Klein Bottle which is a non-orientable surface in 4D space.
An easier way to visualize these types of objects is through the following rectangle diagram which illustrates how to obtain the object in question from a flat piece of paper. The diagram below illustrates how to obtain a normal loop (not to scale).
 By lining up the black arrows along the border in the same direction and connecting one edge to another, one would automatically create a normal loop. The red arrow indicates that when travelling around the connected loop, the left hand side remains the left hand side and the same goes for the right hand side, indicating that our surface is orientable.
In contrast, the way one can obtain a Mobius strip from a flat piece of paper is illustrated through the diagram below (not to scale) where this time, the black arrows are in opposite directions, meaning that when the two edges are joined together, a twist is necessary to make the arrows line up.

As can be seen, by connecting the edges with a twist in this way, this leads to a completely different image. When travelling around the completed Mobius loop, the left and right hand directions flip places! This ‘flip’ is indicated by a change in colour in the above image and also illustrates non-orientability.
Adding these additional arrows to the strips used in the experiment can help foster a deeper understanding of the mathematical concepts at work.
This helps us understand the rather mysterious property of the Mobius strip which is that if it is cut lengthwise, another Mobius strip with four twists is obtained! This can be explained using the diagrams that were used before:

As can be seen, when a Mobius strip is cut in half, two smaller Mobius strips with the same number of strips are obtained. Due to the fact that it is necessary to add twists to align the edges, another two extra twists are added. If the number of twists were some odd number ‘n’, by this method, one would be able to figure out a Mobius strip with n+n+2 or 2n+2 twists! This agrees with what we were seeing from the experiment as a Mobius strip with 1 twist becomes a loop with (2 x 1)+2=4 twists!
If one were to bisect a strip with an even number of twists, they get two interlinked Mobius strips both with the same number of twists. Thus a loop with two twists splits into two loops each with two twists and so on. From our diagram, this can be seen as no extra twists are required to align the edges.
Applications
Mobius strips were once used in conveyor belts since their geometric structure ensured that the forces on the belt were distributed over both sides of the belt rather than on just one side. Their use in conveyor belts has fallen into disuse due to the availability of better materials.
Mobius strips were used in the design of non-inductive electrical resistors. Resistors are common electrical components used in nearly every electronic appliance. However, pure resistances do not exist. Most resistances have a parasitic inductance – an electrical characteristic which makes them prone to wasting energy. The concept of the Mobius strip has been used in the structure of electrical resistors to reduce this unwanted inductance. This approach is effective because the shape and structure of the electrical component is closely related to its electrical characteristics such as resistance and inductance.
Research
Topology is a vast subject of Mathematics which involves studying the properties of certain types of surfaces. Mobius strips form a type of surface studied in Topology. The mathematics of Mobius strips are used to solve problems both in Topology itself as well as in other disciplines. For example, Topology is used in Biology, where Knot Theory is used to study the effects of certain enzymes on DNA. Topology is also used in condensed matter physics, quantum field theory and physical cosmology.
The geometry of Mobius strips is also being used in Chemistry to create new molecules for interesting and exciting applications. In order to create these molecules, a half-twist is introduced in the ‘flat’ (planar) structure of the molecules. The structure obtains a shape very similar to a Mobius strip, having one edge and one face. This special structure means the molecules can be used in optical materials. However, these molecules are immensely difficult to produce and can have unpredictable behaviour. Scientists are studying these molecules using theoretical methods and computer simulations as well as experimental tests.
- Create a Mobius strip with 2 twists and cut it in half.
- Cut the Mobius strip very close to the edge, instead of in the middle of it’s width.


